Warzone Season 1 Hub
Everything that changed with the Modern Warfare 4 integration, in one place: maps, modes, movement, weapons, perks, the new economy and the tips that actually matter.
Built by DODGE aka B. Stromblad, founder of ContentForgeStudio.com
Community-made by Beast Mode Squad and not affiliated with, endorsed by, or sponsored by Activision, Infinity Ward, Raven Software or Beenox. Last checked November 12, 2026. Sourced from the official Call of Duty Season 1 blog and patch notes; things we haven’t verified are labeled.
New Maps
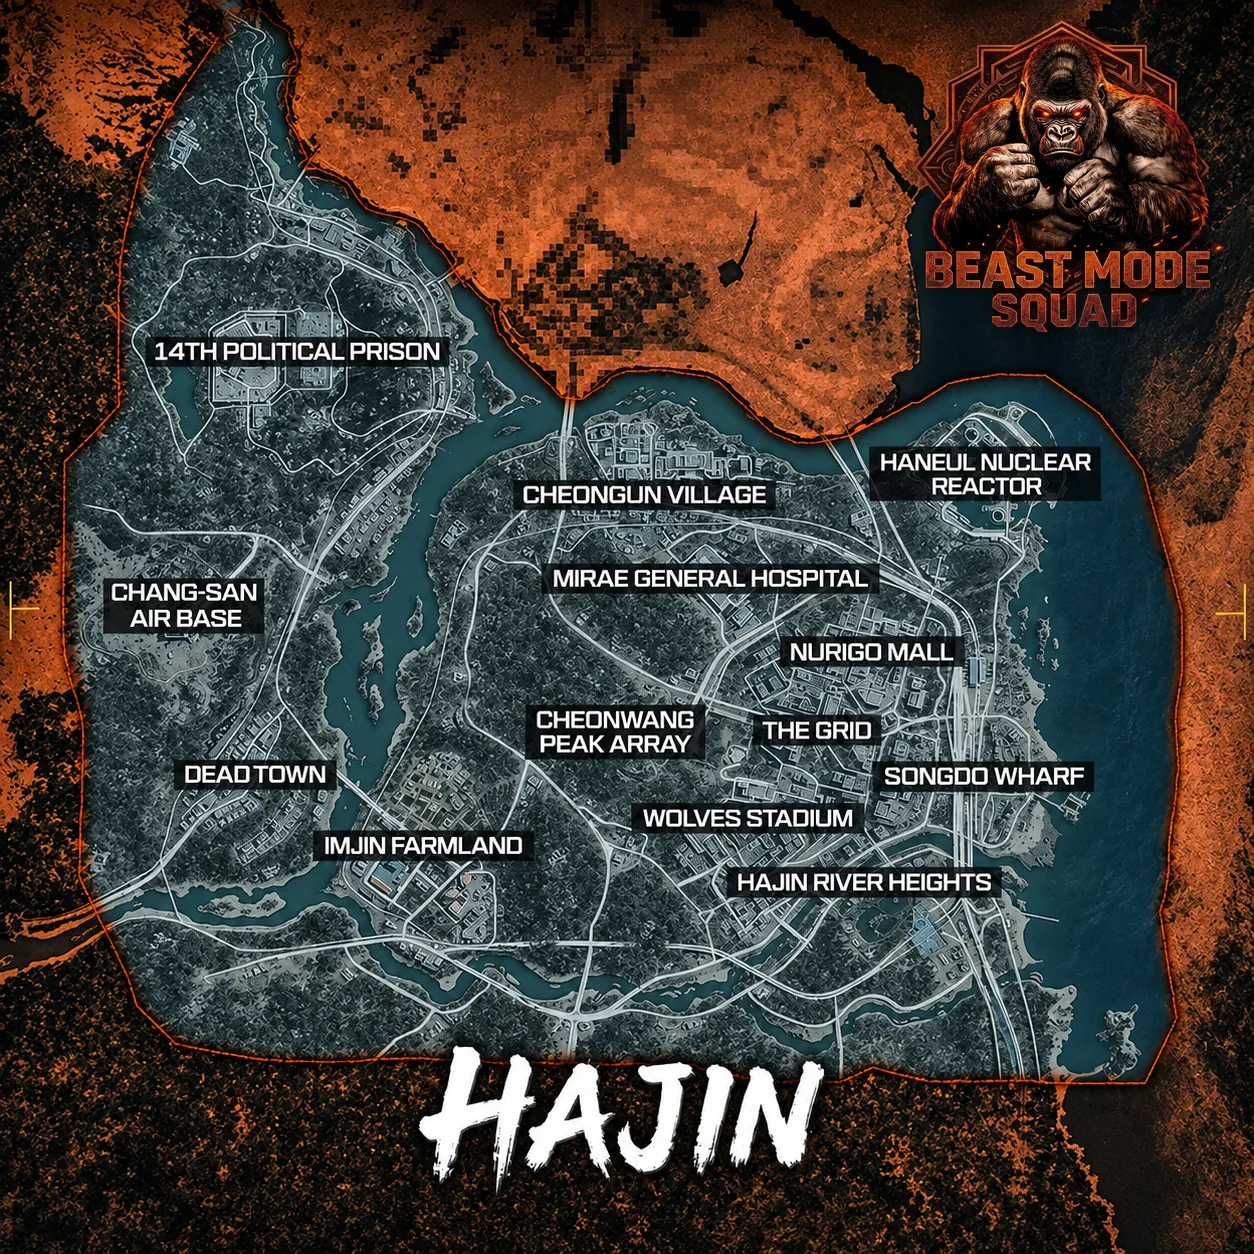
Hajin Battle Royale
13 major POIs, variable weather, a new Gulag and Massive Resurgence. Open the full guide →
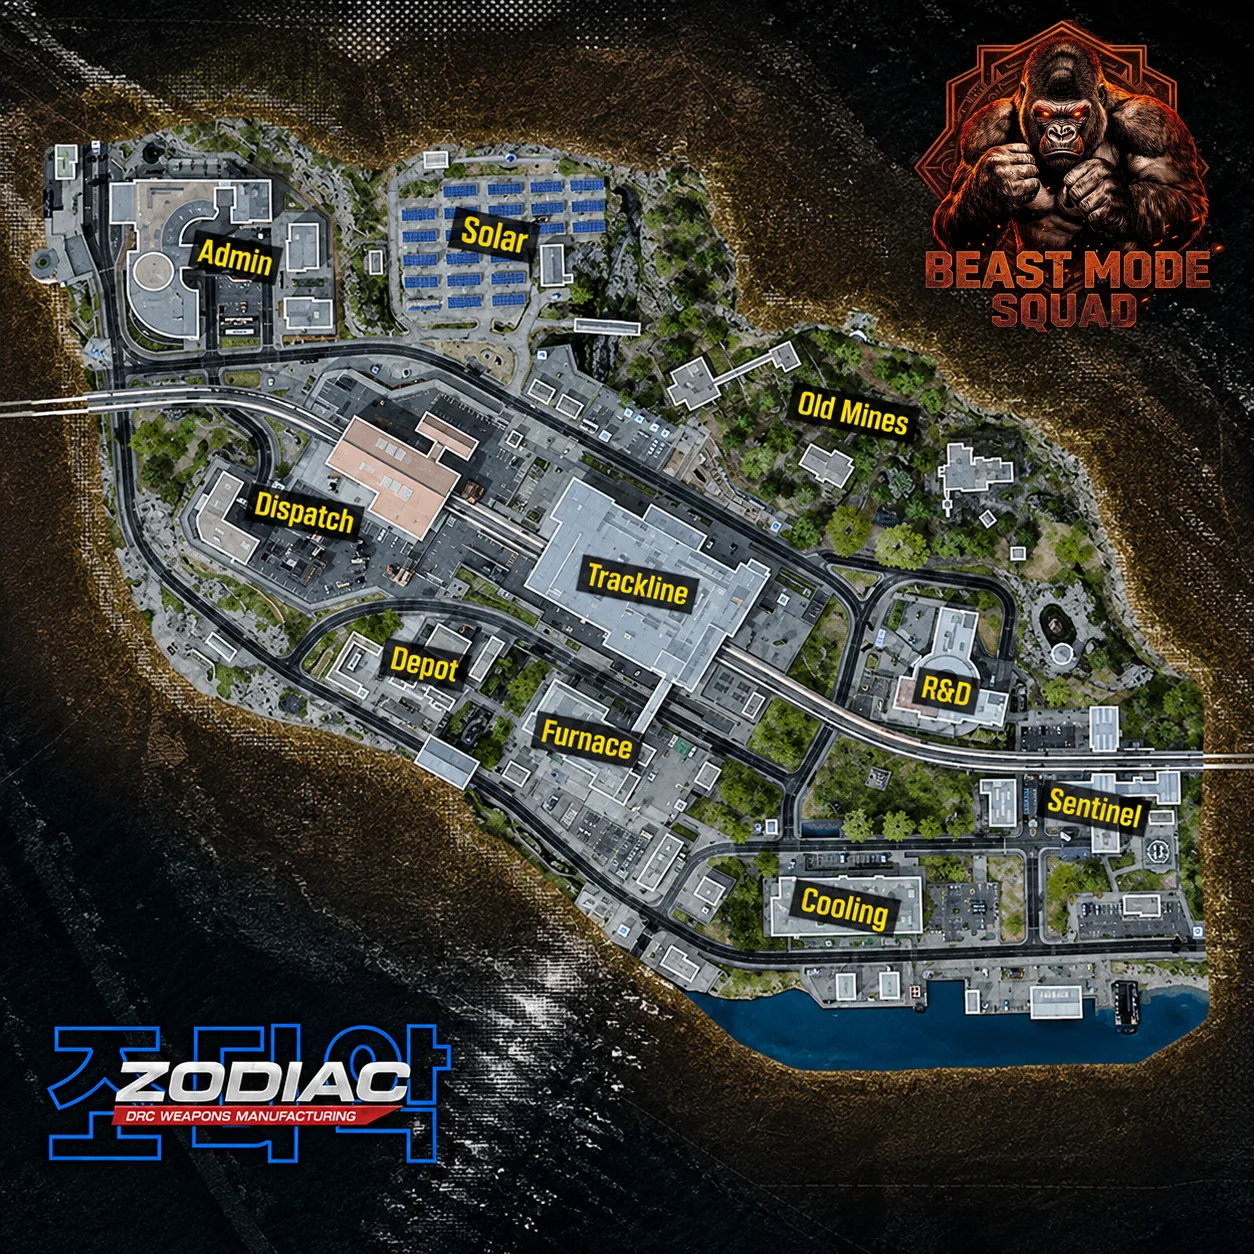
Zodiac Resurgence
10 POIs, moving trains and the Rally Point mode. Open the full guide →
- Verdansk returns “in-season” (later in Season 1) and Rebirth Island is also listed as returning in-season.
- Avalon, Fortune’s Keep and Haven’s Hollow are not mentioned in the official Season 1 notes, so we can’t confirm where they stand yet.
Modes
- At launch: Battle Royale, Battle Royale Casual, Resurgence and Resurgence Casual.
- Limited-time: Rally Point (Zodiac, 20 players), Massive Resurgence (Hajin, up to 120) and Loaded Resurgence (Zodiac or Rebirth Island, 44).
- Coming mid-season: Extreme Resurgence and Rockets and Snipers.
- Private Match is disabled for Season 1 and returns in Season 2.
Movement & Gunfights
- Tactical Sprint is back for everyone — no perk needed. It adds about 0.5 m/s, lasts up to 4 seconds at full stamina, and uses no stamina with a melee weapon out.
- Slides are faster: shorter cooldown, no ADS slide distance penalty, no slide-to-sprint delay and a 25% smaller slide-to-jump height penalty.
- Hitscan: all ballistic weapons got a 3.91x hitscan increase, and true hitscan now reaches about 35 meters on average.
- Gunplay feel: less flinch, weapon bob and screen shake, and faster weapon raise, swap and ADS movement.
- Wingman perk: allies cost less to buy back and your redeploys don’t produce a flare.
Weapons
- 33 MW4 launch weapons plus more through Season 1. New this season: the Cronen Osprey assault rifle (Battle Pass Tier 16, or the Tier 87 Blueprint) and the CSG-35 SMG (Tier 36, or the Tier 73 Blueprint).
- Legacy tab: every weapon from Modern Warfare II through Black Ops 7 is still usable as a preset five-attachment build. Legacy weapons can’t be edited in Gunsmith and don’t support Mastery Camos.
Perks (18 total)
Slot 1
Slot 2
Slot 3
Elite perks (equip one)
- Athleticism improves agility while strafing, crouching and aiming down sights, and costs $8,000 at a Buy Station.
- Phantom costs $10,000. It is sold at upgraded Buy Stations (after a Supply Run Contract) and at Fly Buy mobile stations, and it keeps you hidden from enemy Recon Killstreaks, equipment and perks.
- Tempered: refilling armor takes two plates instead of three.
Economy, Circles & Buy Stations
Prices are from the official Season 1 patch notes. Stations and prices can change in later patches.
| Buy Station item | Price |
|---|---|
| Armor Plate | $300 |
| Teammate Revive | $4,000 |
| UAV | $8,000 |
| Specialist | $30,000 |
| Athleticism (Elite perk) | $8,000 |
| Phantom (upgraded station) | $10,000 |
- Supply Run Contracts: completing one upgrades the targeted Buy Station for all squads for the rest of the match, and extra Elite perks come from these contracts.
- Fly Buy: drones cross the map and drop mobile Buy Stations, which sell weapon Augments and benefit from Fire Sales. They show up around circle 3.
- High Value Loot Zones: now one per match (it was three), and the contract cash multiplier is gone, so chaining contracts pays less.
- Battle Royale circles: 10 circles, with circle 1 starting after 2:25 and closing over 2:50. Resurgence: 8 circles, with circle 1 after 1:30 closing over 2:30. Matches run roughly 5.5 minutes shorter.
- Grabber Drone: picks up a downed teammate and brings them closer for the revive.
BMS Squad Game Plan: Supply Run to Fly Buy BMS squad plan
How we get the whole squad loadouts, Phantom, gas masks and armor satchels, then rotate ahead of the gas. The plan is ours; the mechanics it leans on come from the official Season 1 notes.
Loadouts and a Buy Station upgrade
- Chain a Supply Run Contract early. Have one player pick up a Supply Run Contract right off the drop and take it to the targeted Buy Station. Completing it upgrades that station for the rest of the match and unlocks higher-tier purchases, including Phantom ($10,000) and Fieldcraft ($8,000). In the menu, BMS players see these as the three “redacted” slots that open up for the Elite perks.
- Loadouts first, Phantom second. Pool early contract and crate cash on your Loadout Marker first (it lists at $6,000 or $10,000 on the official price table), so everyone has their Cronen Osprey, Vulcan and AR or SMG setups. Spend what is left on Phantom.
- One Elite perk at a time. You can only equip one, so don’t grab Athleticism ($8,000) or Fieldcraft over Phantom by accident.
- The upgrade is shared. The upgraded station opens up for every squad that uses it later in the match, so buy what your team needs and rotate out.
Gas masks, satchels and mobile stations
- Hunt the Fly Buy drones around circle 3. They drop portable Buy Stations. The official mobile station list includes Gas Mask ($4,000), Self-Revive Kit ($4,000), Grabber Drone ($3,000, stock 2), Advanced UAV ($25,000, stock 1), Perk Supply Box ($6,000) and Phantom ($10,000).
- Chase the Supply Drop event. Each crate fully equips one player with legendary weapons, a Gas Mask, an Armor Satchel, a Self-Revive and a Perk Box. Ping the plane on your tac-map and the ping carries over to the falling crate.
- Use Ground Ops for guaranteed gear. Radioactive Cache is listed as guaranteeing a Gas Mask (two in larger squads) and Safe Crack as guaranteeing an Armor Satchel (two in larger squads).
Rotate early and own the endgame
- Rotate on the thin side, early. Don’t sprint out of the gas across open ground. Move along the narrow edge of the new circle as soon as the timer starts. If you have an Insight from a Recon Contract, it reveals the next safe circle if one isn’t already visible.
- Grabber Drones for safe resupply. The Grabber Drone can pick up loot, environmental objects and downed teammates, and can retrieve Buy Station loot, from a distance. It has limited battery life and can’t pick up downed enemies yet (that’s planned for Season 2).
- Split your elevation. Put your two Cronen Osprey and Vulcan players on high ground (rooftops or ridges) with Phantom active, and keep your two AR or SMG players one level below on stairwells and zip lines. Phantom hides you from standard UAVs without requiring you to stay still, though an Advanced UAV can still reveal your last known position (but not your heading).
- Save a gas mask for the final circle. Keep at least one for a late reposition play.
Prices, stock and event contents are from the official Season 1 patch notes and blog. Supply Drop contents, Ground Ops guarantees, Fly Buy timing and Insight come from the portion of the notes we could only read in summary, so double-check them in a match. Patches can change any of this.
Smart Plays From the Patch Notes
Practical takeaways based on the official Season 1 changes. These are BMS’s read on the notes, not official advice.
- Tempered saves plates. It cuts an armor refill to two plates instead of three, so a $300 plate stretches further.
- Use Tactical Sprint with a knife out. With a melee weapon equipped it uses no stamina, which makes it a free repositioning tool between fights.
- Slide-cancel into jumps and sprints. The slide-to-sprint delay is gone and slide-to-jump lost 25% of its height penalty, so chain them to change angles fast.
- Expect longer-range fights to resolve faster. With hitscan reaching about 35 meters on average, you can’t rely on bullet travel time at mid-range anymore.
- Know the circle clock. In Battle Royale circle 1 starts at 2:25, so plan your rotation before the first close, not after.
- Wingman for aggressive squads. Cheaper buy-backs and flare-free redeploys make it strong if you play fast and re-deploy often.
BMS Community Tips Testing
Tips from the community and from BMS players. Not confirmed by official sources — we’ll move each one up to “verified” or remove it after testing.
- Aim assist on controller: some players report that moving both sticks in opposite directions during a gunfight makes aim assist stick harder to the target. We’re testing this on stream.
- Focus Behavior: keep it off (not “Auto”) in combat unless you’re on a dedicated sniper, because players report it slows aim-walking. We haven’t confirmed the exact effect.
- Optic rail position: sliding your optic closer to your face is said to cut visual recoil and make targets easier to spot. We’re testing.
- Stairs: jump the first few steps to climb faster, and slide down with your primary up. Shoulder-peek around corners with a knife out to check lines safely.
- Drop zone planning: use the plane intro to check where the first circle sits before you pick a landing zone.
Live Right Now
New posts, patches and hotfixes land on Live Intel first.
Sources: Official Warzone Season 1 blog · Official Season 1 patch notes. Circle timings and Fly Buy timing also appear on mw4.gg and mw4intel.app. Details may change as patches land.
More from the BMS tactical toolkit: